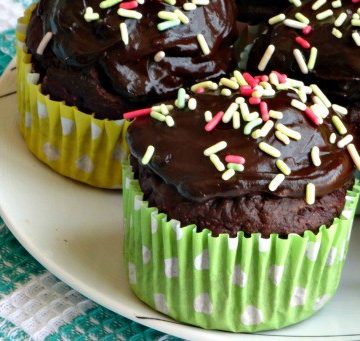
Is there really a better cupcake flavour than Red Velvet? When making cupcakes, there’s usually not much you can do if you want to really wow people with your treats. Vanilla sponges are easy but boring, just like chocolate ones. You could add nuts – but not everyone likes nuts. How about swirling in some seasonal berries? Same problem as nuts - not everyone likes berries. Usually you can’t go wrong with chocolate chips, but deep down, it’s still the same old vanilla cupcake.

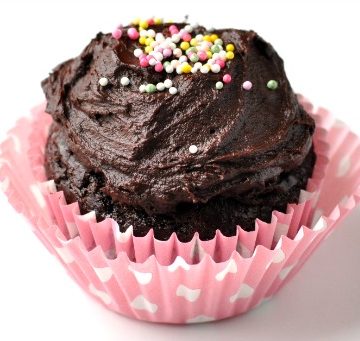
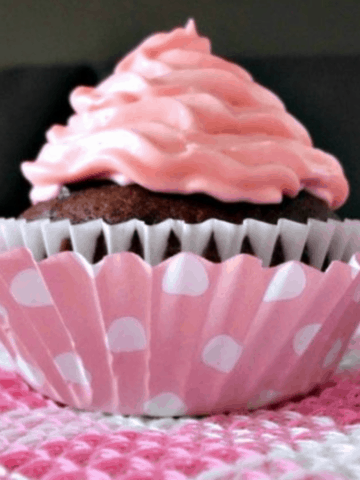
Then there’s Red Velvet – a light, yet somewhat dense velvety texture with just a hint of chocolate and a fantastic vibrant colour that will always grab people’s attention. Red Velvet Cupcakes are usually coupled with a rich cream cheese frosting, but if you’re not so keen on this type of frosting you can try a whipped cream frosting to achieve the same look.
Red Velvet Cupcakes with Whipped Cream Frosting
Makes 12 cupcakes
Ingredients
125g flour
¼ teaspoon baking powder
¼ teaspoon salt
10g cocoa powder
57g unsalted butter
150g sugar
1 egg
1 teaspoon pure vanilla extract
120ml buttermilk
1 tablespoon red food colouring
½ teaspoon white vinegar
½ teaspoon baking soda
Whipped Cream frosting from Joy of Baking
120ml double cream
½ teaspoon vanilla extract
1 tablespoon sugar
Recipe
1. Preheat oven to 175C/350F and line a muffin tin with 12 paper liners. In a bowl sift together the flour, baking powder, salt, and cocoa powder.
2. In another bowl, beat the butter until soft then add the sugar and carry on beating until light and fluffy. Add the egg and vanilla extract and beat until combined.
3. Separately, whisk the buttermilk with the red food colouring.
4. Add half of the flour mix to the butter and sugar, followed by all of the buttermilk then the rest of the flour mix and fold together until just incorporated – do not over-mix!
5. In a small bowl combine the vinegar and baking soda. Allow the mixture to fizz before quickly folding into the cake batter.
6. Pour the batter into the prepared cupcake cases and bake for approximately 20 minutes, or until a toothpick inserted in the centre of the cupcakes comes out clean. When ready, remove the cake from the oven and leave to cool completely on a wire rack.
7. Whilst the cupcakes are baking, make the whipped cream frosting. Pour the milk, vanilla extract and sugar into a bowl and place in the freezer along with the whisk you’re planning on using to whip. This may sound strange, but the cooler your ingredients and equipment are, the more voluminous your frosting will be.
8. After about 10 minutes, remove from the freezer and whip whip whip! until you have a suitably thick frosting for coating your cake. Make sure your cupcakes are completely cooled before you frost them. You can pipe your frosting on, or just spread it with a blunt knife like I did.
AikoVenus
This is my first time on your blog and let me just say that it is so wonderful! ^^ The recipes and ideas are so creative and the pictures are really lovely - and a great recipe for red velvet!
Nicola
Thank you so much! I'm glad you like my blog. 🙂 I'm your newest follower!
Debra Kapellakis
Look and sound very yummy!
Clairejustine
These look great,Pinning these yummy 🙂 Thanks for linking up to creative Mondays
Nicola
Thanks for the pin!
Angie {Successful2gether}
Mmm red velvet is sooo good!
thank you for linking up on Successful Saturdays!!!
Becolorful
I didn't have a red velvet recipe. Thank you for this one. Can't wait to give it a whirl. Thank you too for sharing this week on BeColorful.
p
Michelles Tasty Creations
Mmmmm, these look Amazing! Can't wait to try them. Thanks for sharing at Creative Thursday. Have a great week.
Michelle